Austin’s post-construction final walk-through checklist confirms your project meets closing requirements and occupancy standards. This systematic review differs from a standard home inspection because it focuses on verifying completed work against your contract specifications.
Austin’s local building authority conducts a final inspection that examines code compliance and safety requirements before issuing a certificate of occupancy. We coordinate our walk-through process to align with what inspectors will review, ensuring no surprises during the official closeout phase.
What Documents And Tools Should You Bring To The Final Walk-Through?

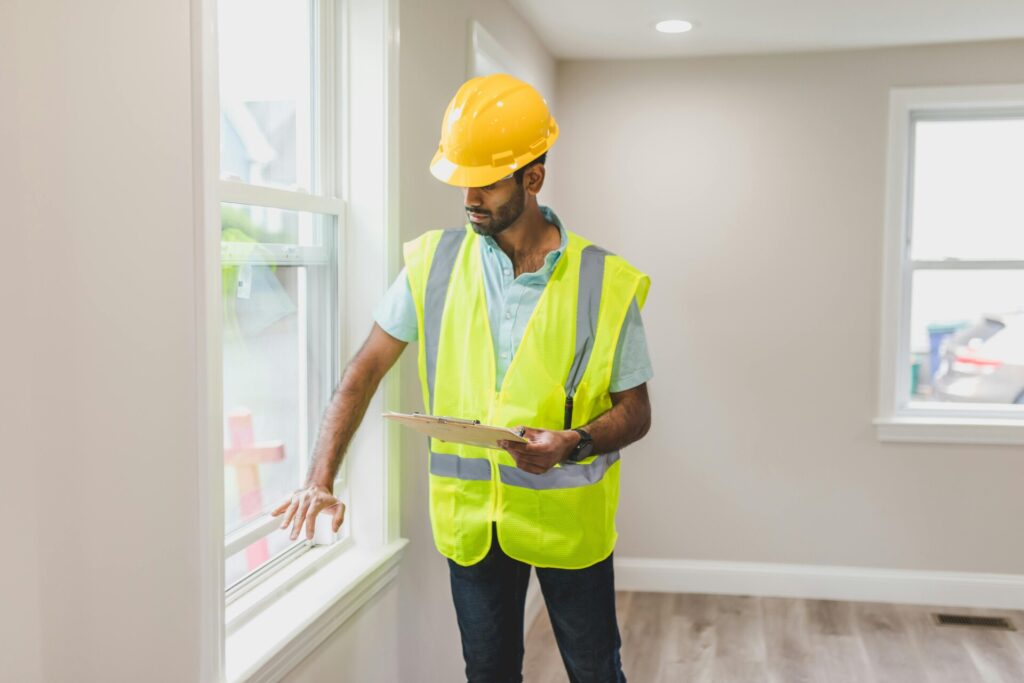
Preparation determines how effectively we can verify construction quality during the final walk-through. The right documentation and simple testing tools help identify issues quickly while maintaining an organized review process. We recommend bringing essential items that serve specific verification purposes rather than overloading yourself with unnecessary equipment.
Your phone serves double duty as both camera and testing device. Document any defects or concerns with photos that include surrounding context for reference. The built-in camera captures finish details, visible damage, or incomplete work that needs attention. A phone charger functions as an outlet tester when plugged into every receptacle throughout the building to confirm electrical connections work properly.
Essential documentation includes your home inspection report and purchase agreement. The inspection report contains negotiated repairs that must be verified as complete before closing. Cross-reference each repair item against the actual work performed to ensure quality and scope match agreements. The purchase agreement lists included fixtures and appliances that should be present and functional during your review.
We always recommend bringing a comprehensive documentation packet containing approved plans, completed inspection certificates, and repair receipts with completion dates. Approved plans help verify the construction matches permitted work and catch any deviations that need addressing. Inspection certificates confirm trades passed their individual reviews. Repair receipts with dates provide proof of completed work and help track warranty periods.
A simple notepad and pen allow you to log questions, note incomplete items, and create action lists during the walk-through. Digital notes work too, but paper provides reliability and doesn’t depend on battery life. Take time to write legible notes that reference specific locations and problems.
Move through the space deliberately rather than rushing. This represents your final opportunity to catch issues before ownership transfers. Patience during the review process helps identify problems that might otherwise get overlooked in the closing timeline pressure.
What Exterior Items Should You Verify Before Closing?
The exterior walk-through covers three critical areas: the building envelope, site conditions, and access elements. We approach this systematically to ensure code compliance and long-term performance.
Building Envelope Inspection
Start with the structure’s protective shell. Windows and doors should operate smoothly with intact seals and proper weatherstripping. Check that all caulking around penetrations appears fresh and continuous, with no gaps or cracking that could allow water infiltration.
Paint finishes require careful attention. Look for complete coverage without patches, holidays, or areas where primer shows through. Cover plates around outlets and fixtures should sit flush against surfaces. These details matter because incomplete finishes often indicate rushed work that may extend to less visible components.
Site Drainage and Grading
Water management determines the building’s long-term integrity. Verify that soil grading slopes away from the foundation at minimum code-required ratios. Standing water near foundations signals problems that will only worsen over time.
Test gutters by running water through downspouts during your inspection. Gutters should direct flow completely away from the structure, typically extending at least three to five feet from the foundation. Look for proper fastening and adequate slope toward outlets.
Irrigation systems need individual zone testing. Turn on each zone and walk the coverage area to confirm all heads function properly. Broken or misdirected heads can create drainage problems or dead landscape areas that become maintenance headaches.
Roof and Structural Elements
Examine the roof from ground level for obvious damage, missing components, or installation defects. Pay attention to flashing around penetrations, edge conditions, and the integrity of gutters and downspouts. Even small defects can lead to significant water intrusion issues.
Porches, decks, and patios require structural verification. Check that fasteners appear properly sized and spaced according to the construction type. Concrete surfaces should be level without settlement cracks. Pavers need consistent spacing and secure base conditions.
Access and Safety Features
Driveways and walkways must provide safe, even surfaces without trip hazards. Look for proper transitions between different materials and adequate drainage to prevent ice formation or standing water.
Address numbers deserve attention because they affect emergency response capability. Numbers should be clearly visible from the road and meet local size requirements for the property type. Commercial properties typically require larger signage than residential structures.
Egress paths and right-of-way sidewalks must remain clear and accessible. Any obstructions that could impede emergency access or normal pedestrian traffic need immediate correction.
Stairs and handrails follow specific code requirements for height, spacing, and structural attachment. Handrails should be firmly secured with proper clearances from walls. Guardrails around elevated areas need adequate height and intermediate spacing to prevent falls.
ADA Compliance and Accessibility
Required ADA elements vary by project type and scope, but common features include proper ramp slopes, door hardware heights, and accessible parking spaces where applicable. These elements often receive close scrutiny during final inspections because non-compliance can prevent occupancy.
Accessibility features should integrate seamlessly with the overall design while meeting dimensional and operational requirements. Temporary solutions rarely satisfy code requirements and typically require permanent corrections before occupancy approval.
Mechanical and Utility Systems
Test all exterior spigots by turning them on and checking for proper flow and shutoff. Exterior lighting and fans should operate from their designated switches. These simple tests often reveal wiring issues or incomplete connections.
Parking areas with required striping and signage need verification for compliance with local standards. Commercial projects typically have specific requirements for accessible spaces, loading zones, and traffic flow patterns.
Erosion Control and Environmental Features
Erosion control measures should be installed, approved by authorities, and functioning as designed. Temporary measures like silt fencing may need conversion to permanent solutions before final approval.
Ensure nothing has been moved onto the site that would block inspector access to required areas. While a temporary certificate of occupancy might allow some staging, final approval typically requires complete site access and cleanup.
What Interior Systems, Safety Items, And Finishes Should You Test?
Interior testing requires methodical verification of all mechanical, electrical, plumbing, and life safety systems. We approach this phase systematically, moving through each room while checking every operational component and finish. The goal is confirming that all interior systems function correctly and meet code requirements before occupancy.
Doors And Windows Verification
Test each door and window throughout the building for proper operation and weatherization. Windows and doors should open and close smoothly without binding or excessive force. Verify all locking mechanisms engage securely and screens fit properly without gaps or tears.
Check the integrity of seals and caulk around frames. Clean caulk lines indicate proper installation and prevent air infiltration. Look for any gaps between frames and surrounding surfaces that could affect energy efficiency or allow moisture penetration.
HVAC System Testing
Run both heating and cooling systems to verify proper operation across all zones. Test each thermostat setting and confirm the system responds appropriately to temperature adjustments. Check that heated or cooled air reaches every room effectively.
Verify airflow at all return and supply vents by placing your hand near each opening. Returns should draw air while supply vents push conditioned air into rooms. Listen for unusual noises from the system that might indicate mechanical issues or loose components.
Electrical System Verification
Toggle every light switch and ceiling fan to confirm proper operation. Test each electrical outlet using a phone charger or similar device to verify power delivery. This simple tool provides immediate confirmation that circuits are energized and functioning.
Locate GFCI outlets in bathrooms, kitchens, garages, and outdoor areas where code requires ground fault protection. Press the test button to confirm the outlet shuts off, then reset to restore power. Properly functioning GFCIs are essential for safety in wet locations.
Plumbing System Testing
Run all faucets to test both hot and cold water delivery. Check water pressure and temperature consistency throughout the building. Test showers and bathtubs for proper operation and drainage. Water should flow freely and drain completely without backing up.
Examine drains and traps under sinks for leaks or improper connections. Look for water stains, corrosion, or loose fittings that could indicate plumbing problems. Test toilets by flushing and checking for leaks around the base and connections.
Appliance Operation Checks
Test included appliances according to their basic functions. Run a preheat cycle on ovens, start the dishwasher wash cycle, and operate the garbage disposal if present. Check refrigerator water and ice dispensers where applicable.
Verify that appliances are properly connected to utilities and ventilation systems. Look for any installation issues like improper clearances, missing connections, or incomplete installation details that could affect performance.
Exhaust And Ventilation Testing
Turn on all exhaust fans and hoods to verify proper operation. Listen for consistent airflow and check that fans move air effectively. Bathroom exhaust fans should provide adequate ventilation, and kitchen hoods should draw cooking vapors efficiently.
Check that exhaust systems vent to the exterior rather than into attic spaces or other interior areas. Proper ventilation prevents moisture buildup and maintains indoor air quality.
Life Safety System Verification
Test all smoke alarms by pressing the test button on each unit. Interconnected systems should trigger all alarms when one is activated. Verify that battery backup systems function if hardwired units are installed.
Where sprinkler systems are present, confirm heads are properly installed with protective rings in place. Check that sprinkler heads are free of paint, which can prevent proper operation during emergencies. Look for any damaged or missing components in the fire protection system.
Finish Quality Inspection
Examine paint coverage and edging for consistent application and clean lines. Check trim and caulk lines for proper installation and finishing. Look for gaps, uneven application, or incomplete work that affects appearance and performance.
Inspect flooring seams and transitions between different materials. Verify that transitions are level and secure, and look for chips, scratches, or other damage that occurred during construction. Document any finish defects that need correction before closing.
Additional System Testing
Test garage door operation including automatic openers and safety features. Verify that doors reverse when meeting obstacles and that remote controls function properly. Check doorbell operation and any smart home or security systems that are part of the building.
Examine attic and basement or crawl space areas for moisture issues, duct leaks, or missing insulation. Look for proper installation of mechanical systems and adequate access for future maintenance. Check that insulation meets code requirements and covers all required areas effectively.
How Do Austin Inspections And The CO Affect Your Walk-Through Plan?
We structure our walk-through to align with Austin’s final inspection requirements because they drive the certificate of occupancy timeline. The local building authority conducts a final inspection to verify safety and code compliance before issuing a CO. Understanding their checklist helps us focus on what matters most for permit closeout.
The sequence matters for scheduling efficiency. All prior inspections must pass before the final can be scheduled. This includes rough inspections for electrical, plumbing, and mechanical trades, plus any specialty inspections required by the project scope. We coordinate these systematically to avoid delays that push back closing dates.
Key Pre-Final Requirements
Austin’s Development Services Department requires specific conditions before final inspection. The approved plans must match the finished construction exactly. Any field changes need proper documentation and revisions submitted through the AB+C portal. We verify that MEP systems, insulation, and HVAC components flagged in earlier inspections have been corrected and documented.
The building must be ready for occupancy during inspection. Required exits must be present and clearly marked with proper signage. Accessibility features mandated by ADA compliance must be installed and functional. We confirm handrails and guardrails meet clearance requirements, and address numbers are visible from the road at the correct size for the use type.
Common Final Inspection Issues
Austin inspectors consistently flag certain problem areas. ADA noncompliance tops the list, particularly around accessible parking, bathroom fixtures, and entrance requirements. Plan mismatches create delays when field conditions don’t align with approved drawings. Exposed wiring, improper electrical installations, and obstructed egress paths frequently require correction.
Drainage and grading issues surface during final review. Water must flow away from the foundation, and erosion control systems need proper installation and approval. We check that nothing has been moved into the space that would block inspection access unless a temporary certificate of occupancy specifically allows it.
Managing Failed Inspections
When inspections fail, quick action prevents extended delays. We document all correction items with photos and maintain organized action lists for efficient re-inspection scheduling. The local building authority requires proper documentation of fixes before rescheduling, and delays can push both CO issuance and closing dates.
Clear communication with inspectors helps resolve issues efficiently. We schedule ahead to accommodate potential re-inspection needs and maintain respectful dialogue about code interpretations. This approach streamlines the permit closeout process and keeps projects moving toward final approval.
Conclusion And Next Steps

The final walk-through represents the critical bridge between construction completion and successful project closure. We coordinate these inspections with particular attention to Austin’s local code requirements, ensuring each review aligns with what municipal inspectors will evaluate for your certificate of occupancy. This systematic approach protects both project timeline and your investment.
Document every finding with photographs and detailed notes. When issues surface, obtain written receipts for all corrections and schedule re-inspection promptly. This documentation creates a clear record for local authorities and helps prevent delays that could push back closing dates. We’ve seen how thorough preparation during the walk-through phase directly impacts permit closeout efficiency and overall project success.
Ready to ensure your Austin project meets all final inspection requirements? Contact EB3 Construction to coordinate your walk-through and inspection process.