Cold storage installation is the backbone of modern food and pharmaceutical supply chains—an expertly engineered process creating controlled environments that protect temperature-sensitive products from degradation. At EB3 Construction, each installation is approached as a complex system of interdependent components that must work together to maintain product integrity.
The foundation of any successful cold storage facility is its core infrastructure. We implement specialized insulation panels that create a thermal envelope, effectively separating the internal environment from external temperatures while minimizing energy consumption. This insulation barrier is the first line of defense against temperature fluctuation—a critical consideration in the current climate of rising energy costs and sustainability requirements.
Beyond the visible structures, cold storage installation requires sophisticated refrigeration systems calibrated to maintain precise temperature profiles. In today’s market—where everything from fresh produce to vaccines demands precise temperature control—we integrate advanced compressors, condensers, evaporators, and receivers that function as the mechanical heart of these facilities. As construction professionals, we understand that the success of these systems depends not only on the quality of components but also on their proper installation and integration into the building’s overall design.
What Site Preparation is Required for Cold Storage Installation?
The success of any cold storage installation begins long before the first panel goes up. We start by thoroughly evaluating the proposed location, ensuring it can support the unique demands of refrigerated environments. This critical first step prevents costly modifications later and establishes the foundation for an efficient, long-lasting installation.
Foundation Assessment and Preparation
Cold storage facilities impose significant structural demands on foundations. We conduct comprehensive load calculations to verify that existing concrete slabs can bear the combined weight of insulated panels, refrigeration equipment, and stored products. For new constructions, we recommend high-strength concrete foundations with vapor barriers to prevent moisture migration.
When retrofitting existing spaces, we often need to reinforce floor systems to accommodate concentrated loads from racking systems and equipment. Our engineers evaluate the load-bearing capacity of the existing structure and recommend appropriate modifications where needed. This may include thickened slabs at equipment mounting locations or additional support beams.
Floor insulation is crucial for maintaining temperature stability. We install specialized floor insulation panels directly on the prepared surface before erecting wall panels. This sequence creates a continuous thermal envelope that prevents heat transfer through the floor—a common source of energy loss in poorly designed facilities.
Precise Layout and Marking
Accuracy at this stage translates directly to efficiency during construction. Our teams use laser measurement tools to mark off the exact footprint of the cold storage area on the floor. These markings establish panel placement lines, door locations, and equipment positioning zones.
We carefully plan the layout to optimize workflow and air circulation, ensuring products remain at consistent temperatures throughout the space. Strategic positioning of door openings minimizes air infiltration during loading and unloading operations, significantly reducing energy consumption and temperature fluctuations.
For multi-temperature facilities, we establish clear demarcation between different temperature zones, allowing us to tailor insulation values and refrigeration capacity to specific product requirements. This zoned approach maximizes energy efficiency while maintaining proper conditions for various perishable goods.
Ventilation and Utility Preparation
Proper ventilation remains essential even in cold environments. We integrate appropriate ventilation systems that maintain air quality while minimizing thermal exchange with the exterior. For freezer applications, pressure relief vents prevent structural damage caused by temperature differentials.
Before panel installation begins, we coordinate the pre-installation of electrical conduits, refrigerant lines, and drainage systems. This forward-thinking approach eliminates the need to compromise the thermal envelope after completion. By embedding these systems within the insulation framework, we maintain barrier integrity while providing service access points.
Drainage considerations become particularly important for spaces requiring regular washdowns or handling products with high moisture content. We incorporate appropriate slope into the floor design and install specialized drains that prevent air infiltration while allowing water evacuation.
Special Considerations for Existing Structures
When installing cold storage within existing buildings, we perform thorough assessments of the surrounding environment. We examine ceiling heights to ensure adequate clearance for refrigeration equipment and air circulation. Wall and ceiling construction must accommodate potential condensation issues through proper vapor barriers and insulation.
Adjacency to other building systems requires careful planning. We identify potential conflicts with HVAC systems, plumbing, and electrical infrastructure early in the process. Our construction sequence integrates seamlessly with other trades, minimizing disruption to ongoing operations.
With meticulous site preparation, we establish the groundwork for an efficient, durable cold storage installation. This attention to detail during the preliminary stages prevents common issues such as energy loss, moisture infiltration, and structural inadequacies that often plague hastily constructed facilities. Through comprehensive foundation assessment, precise layout planning, and integrated systems design, we create cold storage environments that perform efficiently for years to come.
How Are Cold Storage Panels Installed?
Cold storage panel installation requires precision and a methodical approach. As general contractors with extensive experience in refrigeration projects, we know that proper installation directly impacts energy efficiency and operational performance. Our systematic approach ensures each component functions optimally within the entire cold storage system.
Floor Angle Installation
We start by establishing the foundation with properly installed floor angles. Our crews typically use 100 x 75mm floor angles made from the same material as the panel cladding to ensure material compatibility and thermal consistency. These angles are securely fixed to the concrete surface using Hilti nails, precisely positioned according to the cold room’s specified dimensions.
Before mounting any angles, we meticulously check that the concrete floor is perfectly level. Even minor irregularities can compromise panel alignment and create air leaks that reduce efficiency. In facilities with continuous traffic flow like processing areas, we account for level differences in the floor insulation to prevent premature wear.
For installations requiring additional floor insulation, we often implement a system of floor panels that sit within the U-channels before wall panel installation begins. This creates a contiguous thermal envelope from the ground up, critical for maintaining consistent temperatures in low-temperature applications.
Wall Panel Assembly Process
Once the perimeter is established with floor angles, our crews begin erecting wall panels. Starting from one corner, we ensure the first panel is perfectly plumb and square. A thin, even layer of sealing compound is applied to all joining faces before panels come together, creating the airtight seal essential for thermal efficiency.
Corner assemblies require particular attention. We join corner panels with adjoining wall panels using external and internal aluminum angles, carefully aligning each component. Orientation is crucial; panels must be installed with the proper side facing upward to ensure cam locks engage correctly.
The cam lock system provides the mechanical connection between adjacent panels. Before connecting panels, we verify each locking device is in the correct starting position by turning them counterclockwise until they stop. After positioning panels together, a clockwise turn of the wrench engages the male cam lock with the female receptor, creating a tight, secure bond. We continue this process methodically around the room until all wall panels are installed.
Ceiling Panel Installation Techniques
Ceiling installation represents the most challenging phase of cold room construction due to the elevated work and precision required. Our installation teams carefully position ceiling panels to rest securely on the wall panels’ top edges. Before placement, we apply sealing compound along the outer plate seam of each ceiling panel.
Working systematically from one end, we position each panel according to the approved drawings, ensuring proper alignment with wall panels and any suspension systems. As with wall panels, the cam lock system secures adjacent ceiling panels. After all ceiling components are in place, we apply a continuous bead of white sealing compound at all wall-ceiling junctions, creating seamless transitions between surfaces.
Proper sealing is critical in preventing condensation and ice formation at joint locations. We meticulously fill all panel joints with silicone sealant, creating an airtight and waterproof barrier throughout the entire enclosure. Attention to these seemingly small details ultimately determines the cold room’s operational efficiency and longevity.
Final Connections and Testing
After completing the panel structure, we install all accessories including light fixtures, pressure release valves, and door assemblies. Door installation requires particular precision—the door frame must be perfectly aligned within the wall cutout to ensure proper operation and sealing. We typically install pressure release valves above door openings to equalize room and ambient pressures, preventing vacuum conditions during operation.
Before commissioning, our teams conduct thorough testing of the completed panel structure. This includes visual inspection of all joints, verification of cam lock engagement, and in some cases, thermal imaging to identify any potential cold bridges or insulation gaps. This comprehensive approach to cold storage panel installation ensures the final product meets both regulatory requirements and client expectations for performance.
What Does the Refrigeration System Installation Process Involve?
Refrigeration system installations require precision and expertise at every stage. We approach these projects methodically, starting with the careful positioning of key components according to approved drawings and specifications. The process involves coordinating multiple elements to work in harmony for optimal cold storage performance.
Evaporator Installation
We mount evaporators at ceiling level inside the chiller room to ensure proper air circulation throughout the space. This positioning is critical as it allows for maximum cooling efficiency while minimizing interference with stored products. Before hoisting units into place, all components (thermal expansion valves, nozzles, solenoids) are attached while the evaporator remains accessible on the ground.
During installation, we secure evaporators using threaded rods or bolts through ceiling panels, with appropriate reinforcement for larger units. We ensure proper pitch in the mounting to facilitate condensate drainage—typically a minimum of ¼-inch per foot slope away from the evaporator. This prevents moisture buildup that could compromise system performance.
For units operating below 34°F, we install electric heat tape (typically 20 watts per foot) along with proper insulation on condensate lines to prevent freezing. All refrigerant connections are completed according to manufacturer specifications, with special attention to distributor nozzle placement and expansion valve installation.
Condensing Unit Placement
We position condensing units on steel structures outside the cold room, prioritizing adequate airflow and service access. The capacity of these units must precisely match the evaporator application, with compatible refrigerant types throughout the system. Proper mounting reduces vibration and ensures optimal heat rejection during operation.
Location selection significantly influences our installation approach—we avoid areas with excessive heat, dust, or corrosive environments that could compromise system performance. We always maintain manufacturer-recommended clearances around units for proper ventilation and future maintenance access.
Copper Piping and System Integration
The interconnection between evaporators and condensing units requires carefully designed copper piping networks. We install suction, liquid, and discharge lines with appropriate sizing, support brackets, and insulation to maintain system efficiency. Vertical copper runs receive support at maximum 10-foot intervals, with brackets and clips sized appropriately for the pipe diameter and component load.
When suction lines rise above evaporator height, we install P-traps to ensure proper oil return to the compressor. For installations with multiple evaporators, solenoid valves are placed before distribution tees, while single evaporator setups have solenoids installed before expansion valves. These details significantly impact system performance and longevity.
After completing all connections, we implement a rigorous testing protocol. The system undergoes nitrogen pressure testing to identify any leaks before evacuation begins. We maintain vacuum conditions for a full 24 hours, removing all moisture and non-condensables that could otherwise damage system components or reduce efficiency.
Final System Setup and Control Integration
With piping verification complete, we introduce the specified refrigerant charge and prepare for system startup. Control panels and display units are strategically mounted at appropriate heights for easy monitoring and operation. We configure all controls for automatic temperature maintenance according to the specific requirements of the cold storage application.
During commissioning, we verify proper fan operation, checking rotation direction and secure mounting. Detailed adjustments to superheat, defrost cycles, and temperature settings ensure the system maintains precise conditions. This comprehensive approach delivers refrigeration systems that perform reliably from day one, with all components working together as designed.
What Additional Components Are Needed to Complete Cold Storage Installation?
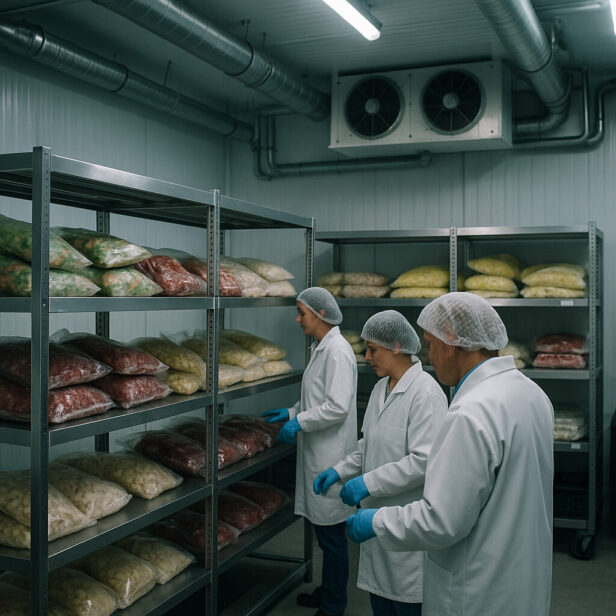
The final phase of cold storage installation requires several specialized components that work together to create an efficient, sealed environment. Each element plays a critical role in maintaining temperature stability and overall system functionality. At EB3 Construction, we have found that careful attention to these finishing components significantly impacts operational efficiency and energy consumption.
Insulated Doors and Protective Barriers
We install heavy-duty insulated doors with self-closing hinges, cutting openings precisely into wall panels according to specific storage requirements. These doors feature stainless steel kick plates to prevent damage during daily operations when pallets and equipment move through frequently.
During installation, we verify door functionality through rigorous testing. A crucial element is the sweeper-type gasket positioned under each door—this creates a tight seal against the floor, preventing warm air infiltration that could compromise internal temperatures. Even a small gap can significantly increase energy costs over time.
For additional protection against temperature fluctuation, we hang PVC strip curtains from the tops of doorways. These transparent curtains create a secondary barrier that maintains temperature differentials while still allowing visibility and passage. We have seen these simple additions reduce cold loss by up to 30% during active loading periods.
Specialized Lighting Systems
Lighting fixtures require special consideration in cold environments. We install vapor-proof LED fixtures at marked ceiling positions using nylon threaded rods and nuts that resist corrosion and thermal expansion issues common in fluctuating temperatures. Unlike standard warehouse lighting, cold storage lighting must be damp-proof with enclosure protection class IP54 or better to prevent condensation damage.
The positioning of these fixtures is carefully planned to eliminate shadows in storage areas while minimizing heat emission. In freezer environments, we have found that LED lighting not only reduces energy consumption but also performs more reliably than traditional lighting options that struggle in extreme cold.
Pressure Management Systems
An often overlooked but essential component is the pressure release valve system. We position these valves strategically above door openings to equalize pressure between the cold room and ambient environment. Without these valves, the temperature differential between inside and outside creates a vacuum effect that can make doors difficult to open or potentially damage the structure over time.
During initial cooling cycles, these valves automatically regulate pressure, preventing the “pump effect” that can compromise door seals and structural integrity. This simple component prevents costly structural issues that might otherwise develop within the first year of operation.
Electrical System Integration
The final component is a properly designed electrical system that can handle the demands of cooling equipment while functioning reliably in cold conditions. We configure power requirements typically at 11 kW, 3-phase, 50 hertz, 380-400 volts for optimal operation of medium-sized installations.
All electrical components must be cold storage-rated with specially-guarded elements that protect against condensation damage. We install sealed conduit systems throughout, ensuring all junction boxes and connections are properly rated for the environment. Control panels are positioned in accessible locations outside the cold zone, allowing for system management without exposure to the cold environment.
For larger installations, we incorporate backup power systems that automatically engage during outages—critical for preserving inventory during unpredictable power failures. The electrical infrastructure we build includes monitoring systems that provide real-time alerts for any temperature fluctuations or system performance issues.
Conclusion: Ensuring Successful Cold Storage Installation
Throughout this guide, we have explored the essential steps of cold storage installation—from initial site preparation to panel assembly and refrigeration system setup. These are not merely sequential tasks; they are interdependent processes built upon exacting standards that ensure the structural integrity and temperature stability your stored products require. Our experience as general contractors shows that meticulous attention to proper sealing techniques, precise component placement, and comprehensive system testing directly correlates with the operational efficiency and longevity of the finished facility.
The commissioning process deserves special attention as the final critical phase of any successful installation. We recommend implementing a gradual temperature reduction protocol rather than immediate cooling to prevent thermal shock, which can lead to concrete floor cracking—a subtle but crucial detail often overlooked by less experienced contractors. By adhering to manufacturer specifications throughout the installation process, conducting thorough documentation of all testing procedures, and properly training facility operators during handover, we create cold storage environments that maintain consistent temperatures, minimize energy consumption, and protect valuable inventory for years to come.
Let our team at EB3 Construction help you build a cold storage facility that meets your exact specifications and operational requirements.